Have you ever wondered how you can transform an ordinary room into something extraordinary? With peel-and-stick wallpaper, you can easily and quickly decorate your home—especially if you’re a renter or like to redecorate often.
Install peel-and-stick wallpaper to add a pop of colour to bland walls, a subtle texture to a ceiling, or a fun pattern to walls, stair risers, and furniture. When compared to traditional wallpaper (which requires pasting), it’s much easier to install and remove. No commitment, no wall damage! Peel-and-stick wallpaper is typically sold by square foot, so your costs will depend on how large of a space you’re looking to cover. You can find it at local home improvement or craft stores for about $70 for 30 square feet, or online shops like Etsy for around $80 for 16 square feet—depending on the shop and material. Regular wallpaper typically costs around $45 for 56 square feet, but this doesn’t account for the other supplies you’ll need or the time you’ll spend applying it.
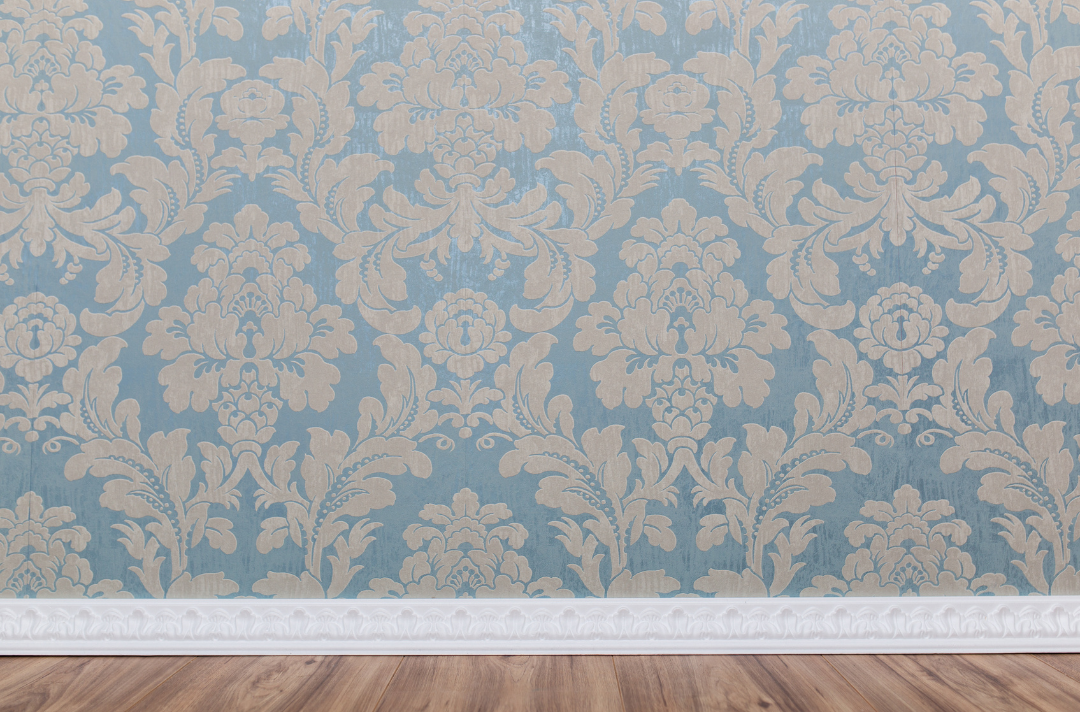
 Image via SweetWallpapers on Etsy
How to install peel-and-stick wallpaper
Using removable wallpaper makes wallpapering a fun DIY weekend project. Self-adhesive wallpaper peels away from its backing, adheres to the wall, and can be removed and repositioned easily—at least once before it possibly loses some of its stickiness. Consider temporary wallpaper if you’re looking for an easy and mess-free way to try a new style.
Determine how much wallpaper you need
Find the square footage of the wall or space you want to cover and divide it by the square foot of one roll. If your wallpaper is patterned, you’ll need to add 20% to ensure the pattern matches on neighbouring strips. Then add an extra roll or two just in case of errors such as short cuts or tears. Also, it’s advised to order a sample of the wallpaper to make sure it’s exactly what you’re looking for before you place your full order.
Gather your tools
You’ll need:
- a tape measure;
- a pencil or chalk line;
- a level or laser level;
- a ruler or straight edge;
- a utility knife;
- a smoothing tool; and
- a step stool or ladder.
 Image via ScandinavianWorkshop on Etsy
Prepare the surface
It’s important for the surface to be clean and dry before installing peel-and-stick wallpaper. Give your walls and baseboards a wipe-down with a microfibre cloth to remove dust. If the area is greasy (like a kitchen backsplash) clean the surface with hot, soapy water and let dry. Remove outlet covers and move all furniture out of the way. If your walls are freshly painted, wait the recommended cure time before installing your wallpaper.
Make your guideline
Measuring left to right from the corner, use a tape measure to measure the width of your first panel and mark with a pencil. Using a level, draw a straight line from top to bottom.
Cut strips of wallpaper
Measure the height of the area and cut strips to fit, adding eight to 20 centimetres to the bottom or sides—wherever the wallpaper will be lining up with the next piece. This accounts for any pattern matching. Large patterns might require more overhang.
Peel and install
Peel back about 20 centimetres of the backing on one strip. Line it up with the ceiling and the guide mark you made on the right. Stick the wallpaper to the wall and then slowly peel and stick the paper down the wall.
Smooth as you go
Use a smoothing tool to push out any air bubbles and to ensure the entire strip is securely attached. Once you reach the bottom, cut the overhang using a straight edge and a very sharp utility knife. Repeat until the wall is covered, paying special attention to matching your pattern at the seams.
Enjoy the new view
Stand back and admire all your hard work!
Keep in mind, you don’t need to cover your entire room with peel-and-stick wallpaper design. Accent walls can be a striking way to add character to your room. Pick the wall that will work best—preferably the one that gets the most natural light—and, ta-da, a new look in your room with only a quarter of the work to do.
Elizabeth Rees, co-founder of Chasing Paper, told Apartment Therapy peel-and-stick wallpaper can last “as long as you’d like to keep it up” so long as you applied it to a clean, smooth surface.
 Image via WestCoastWalls on Etsy
Helpful peel-and-stick wallpaper tips
As with any DIY project, there are many tips to help the task go as smoothly as possible.
- Recruit a helping hand: while peel-and-stick wallpaper can be a solo project, having a helping hand certainly will make things easier and faster.
- Ceilings are not a guide: while you might be tempted to line your wallpaper up with the ceiling, don’t! Most ceiling lines are not straight, causing the wallpaper to appear crooked. Instead, use a levelled vertical line as your guide. The same can be said for corners in rooms. Make sure you’re measuring precisely to avoid any hiccups.
- Don’t pull too hard: as you remove the backing of the wallpaper, it’s important not to pull too hard as it can stretch out the vinyl material.
- Set aside the scraps: you’ll likely end up with a good amount of scraps as you trim the excess from the bottom and top of each strip. Keep these in case you need to fill a tight space. You can also use them on other DIY projects like trays, candle holders, or notebooks!
Surfaces not recommended for peel-and-stick wallpaper
There are many surfaces on which peel-and-stick wallpaper should not be used, as the adhesive may not adhere properly, or the wallpaper may not lay flat.
- Textured walls: without a flat surface to cling to, the wallpaper won’t be secure.
- Brick and cinder block: similar to textured walls, the lack of flat surface poses an issue.
- Outdoors: unless it’s specifically made for the outdoors, the wallpaper isn’t waterproof or weatherproof.
- Non-stick paint: for obvious reasons, peel-and-stick wallpaper won’t work on non-stick paint.
- Old wallpaper: in addition to structural issues, the pattern of the old wallpaper may bleed through the new stuff, which isn’t a visually pleasing aesthetic.
 Image via SandedEdgesFurniture on Instagram
Unique ways to use peel-and-stick wallpaper
There are plenty of peel-and-stick wallpapers on the market that can transform the look of any space, and they’re not just for walls! Here are some fun projects that use peel-and-stick wallpaper to add a little flair to your room!
Add some pizazz to cabinet interiors or bookshelves
Take the insides of your kitchen cabinets or the back of your bookshelves from boring to beautiful. You’ll love seeing a pop of fun every time you reach for a dinner plate.
In terms of application, this follows the same steps as if you were doing a wall, only on a smaller scale. You’ll need to measure, cut, and smooth the wallpaper into the drawer or onto the shelf, making sure there aren’t any air bubbles underneath.
Add interest to a ceiling
If you’re looking for a quick and easy way to give your ceiling a fresh new look, peel-and-stick wallpaper is the way to go! Not only is it easy to install, it’s a great way to cover up any imperfections on your ceiling. You’ll want to recruit a helping hand for this project since you’ll be working against gravity, and four hands will be better than two. Note, this only works on flat ceilings as peel-and-stick wallpaper will not adhere properly to popcorn or textured surfaces.
Materials
- Peel-and-stick wallpaper
- Pencil
- Ruler or straight edge
- Tape measure
- Level or laser level
- Utility knife
- Smoothing tool
Steps
- Move all furniture out of the way. An unobstructed work area will make installation easier. Also, remove any ceiling lights or fixtures.
- Prep the ceiling as per the instructions above, making sure the surface is free from dirt, cobwebs, and dust.
- Make a guide for your first panel. Measuring left to right from the wall; use a tape measure to measure the width of your first panel, and mark with a pencil. Using a level or a chalk line, draw a straight line across the ceiling.
- Measure the length of the area and cut strips to fit, adding eight to 12 centimetres to whichever edge will be lined up with the next sheet to account for any pattern matching.
- Peel back about 20 centimetres of the backing on one strip. Line up with the wall and the guide mark you made on the right. Stick the wallpaper to the ceiling and then slowly peel and stick the paper up onto the ceiling. You’ll find it helpful to have a friend hold onto the slack of the overhang so that as you move your way across the room the weight of the slack doesn’t pull down the panel.
- Use a smoothing tool, push out any air bubbles and ensure the entire strip is attached. Because walls and ceilings aren’t 100% straight, it’s best to ensure your panel is lining up with the guide mark on the right and not the wall. If the panel overhangs onto the wall, use a straight edge and a very sharp utility knife to trim the excess.
- Once you reach the bottom of the panel, cut the overhang using a straight edge and a very sharp utility knife. Repeat until the ceiling is covered.
Tip: If there are junction boxes in the ceiling for lighting, run the wallpaper over them. Use a sharp utility knife to cut a starburst into the wallpaper, starting from the centre of the fitting, outwards. You should be able to trim the excess and wrap the small overhanging edges into the box. Once the fixture is installed you won’t see any of the cuts.
 Image via StickerLime on Etsy
Climb to new heights with stair risers
If you’re looking for an easy and relatively inexpensive way to add a touch of style to your stair risers, peel-and-stick wallpaper is a great option.
Materials
- Peel-and-stick wallpaper
- Pencil
- Ruler or straight edge
- Tape measure
- Utility knife
- Smoothing tool
Steps
- rep the risers as per the instructions above, making sure the surface is free from dirt, grime, and dust.
- Measure your stair riser and mark those dimensions on a piece of cardboard. Using a straight edge, cut out the cardboard template.
- Using the template, trace the shape on the back of the wallpaper, marking it with a pencil. To minimize accidental tearing when cutting, use a very sharp utility knife and metal ruler. Placing wallpaper on an extra-large cutting mat or some pieces of cardboard when cutting can also minimize tearing. You can also very carefully cut the pieces with sharp scissors.
- Before installing, test the fit of the wallpaper on the riser. If the fit is good and tight to the edges, install. Peel back about seven centimetres of the backing. Line up with the top of the stair riser against the tread. Work your way down, peeling the paper backing and stick the wallpaper to the riser. Use a smoothing tool as you go to ensure good, even adhesion. Work out any air bubbles. Repeat until all stairs are covered.
- Take a celebratory climb and then stand back and admire the view!
 Image via RockyMountainsDecals on Etsy
Peel-and-stick wallpaper is a beginner-friendly DIY project that can completely transform a room. The best thing about it is you just need to peel and stick it to the wall, no glue required. It’s also easy to remove, which is handy if you’re in a rental property.
Courtesy: realtor.ca
Posted by Infinity Admin on
Leave A Comment